If you want a font available all the time on your computer, it must be installed. The first thing you need to know is where you have saved the new font you want to add to your operating system. Whether you downloaded them or have them on a CD, you will need to know where they are stored. Click on your operating system to view the step-by-step instructions:
Windows XP and Windows Vista Windows 7 Mac OS X
1)
First, from the start menu, select Control Panel. 
2)
Next, open the Fonts folder. (Double click on it.)
(If you are using the "Category View" choose "Appearance
and Themes." 
When
that opens, click on the Fonts folder.)
3)
Once the folder opens, click on the File Menu at the top. 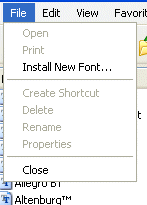
4)
Select "Install New Font." The "Add Fonts" screen
appears.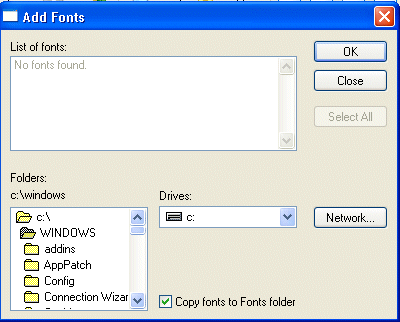
5)
On the bottom half of the screen, choose the drive and the folder location
of the new font or fonts you want to install. 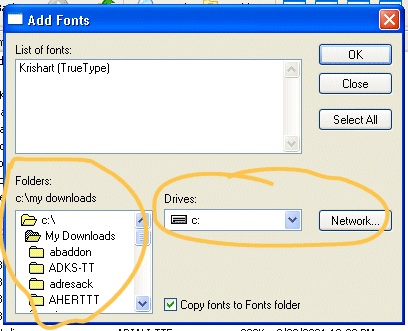
6)
Any fonts that are in the folder you select will be listed on the top
of the screen.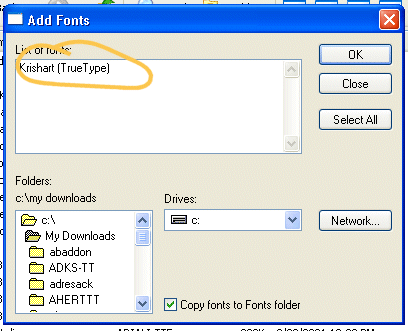
7)
Highlight the font or fonts you want to add or use "Select All"
if you want to add all the fonts in the folder.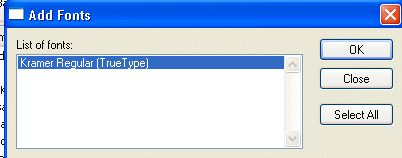 .
.
8)
Make sure the "Copy Fonts to Folder" box is checked.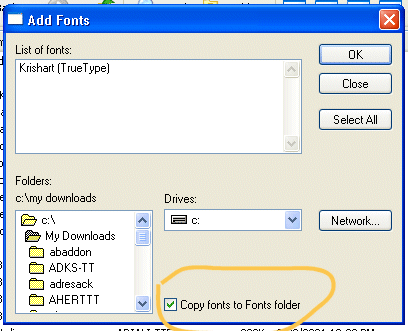
9)
Click OK. 
The
fonts will be added. When done, choose
"Close." 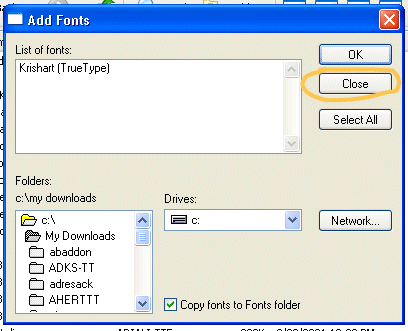
Windows 7 makes adding fonts EASY! Simply go to where you've saved the new font, right-click on it and choose INSTALL.
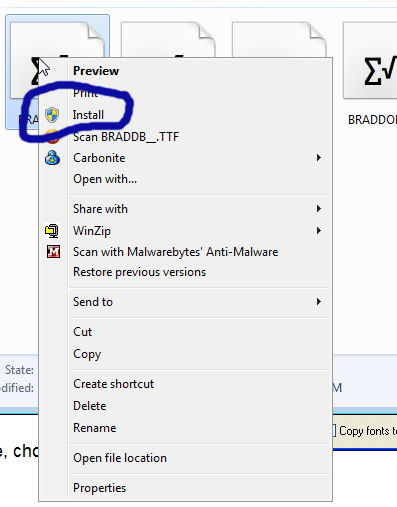
That's it!
1) Expand any compressed fonts packages.2) Double-click the icon of the font file you want to install. The Font Book will open and display the font so you can preview it.
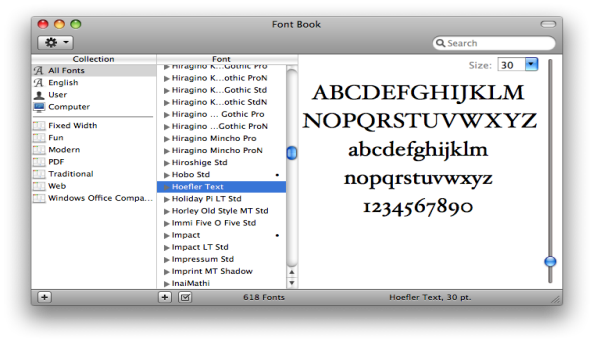
3) By default, the application installs the font in the
Library
folder of your home directory, making it available only to you. To
make it available to all users on the computer, from the
Font Book
menu, select
Preferences... , and then change the "Default
Install Location:" from
User to
Computer.
4) Click
Install Font.
Any questions, please feel free to e-mail us.